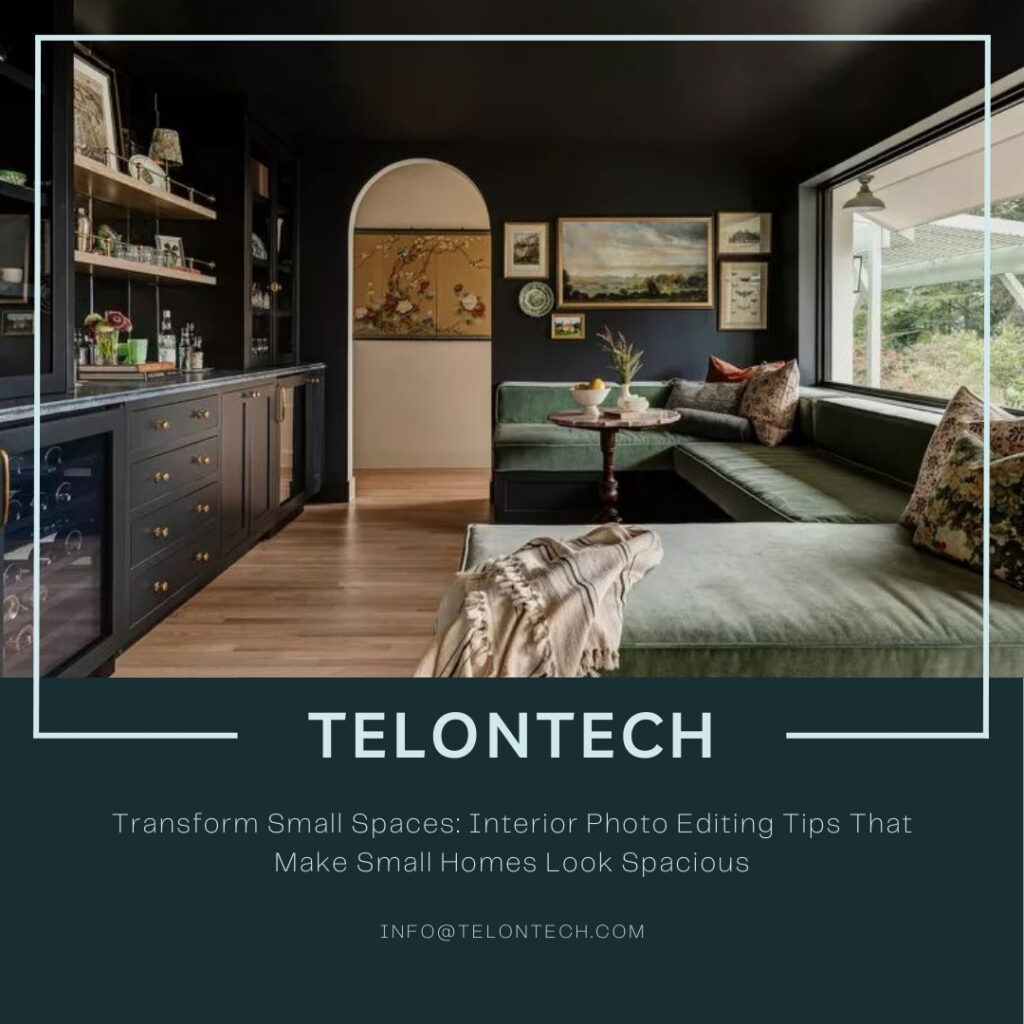
When it comes to Small Interior Space Editing can make or break a listing. Buyers often scroll past homes that appear cramped or cluttered, even if the property has incredible potential. The secret lies in expertly edited photos that enhance space, light, and aesthetics. Interior photo editing is not just about improving colors or brightness—it is about creating the perception of spaciousness while maintaining authenticity. Small homes, especially, require careful attention to angles, light, and composition. This guide dives deep into professional interior photo editing techniques, revealing actionable strategies to make even the coziest spaces look inviting, open, and visually expansive. Whether you are a real estate agent, a professional photographer, or a DIY enthusiast, these tips can elevate your interior photos and attract more viewers to your listings.
1. Optimize Lighting to Open Up the Room
Lighting is the most critical factor in making Small Interior Space Editing. Natural light, when captured and enhanced properly, creates an airy, welcoming atmosphere. During editing, increasing exposure slightly, balancing highlights, and reducing harsh shadows can instantly make a room feel expansive. Avoid overexposing windows; instead, use gradient masks to preserve outdoor details while brightening interiors. Soft, warm light tones create depth, while cool tones often make spaces feel tighter. Additionally, adjusting the white balance ensures that walls and furniture look natural yet open. Layering subtle light enhancements helps your photos appear professionally shot and spacious.
2. Widen Perspectives With Lens Corrections
The angle at which a room is photographed can significantly impact perception. Wide-angle lenses can make rooms feel larger, but distortion is common. Interior photo editing software allows you to correct these distortions while preserving the room’s perceived size. Straightening vertical and horizontal lines prevents walls from appearing slanted, which can create a sense of compression. Using perspective correction tools ensures that floors, ceilings, and corners align properly, enhancing the illusion of space. Subtle adjustments to vanishing points can make Small Interior Space Editing feel longer or taller without appearing artificial.
3. Declutter the Scene Digitally
A cluttered room feels small, regardless of its actual size. While physical decluttering is essential before shooting, photo editing allows you to remove minor distractions, such as scattered objects, cords, or unsightly décor. Clone stamp and content-aware fill tools are invaluable for cleaning up spaces. Removing these elements directs viewers’ attention to the architecture and furniture arrangement. Furthermore, digitally minimizing visual noise creates a more streamlined, open environment. In listings, a clean and spacious-looking room communicates order, which often appeals to potential buyers faster than other features.
4. Enhance Colors to Create a Sense of Depth
Color plays a psychological role in spatial perception. Lighter colors, such as whites, pastels, and muted neutrals, reflect light and create an expansive feeling. In editing, boosting vibrancy selectively without oversaturating can enhance depth. For instance, highlighting lighter areas near walls or windows while slightly toning down darker corners helps extend visual space. Complementary colors can be enhanced subtly to separate foreground and background elements, preventing the image from feeling flat. Consistent color grading across a series of photos reinforces a cohesive, spacious look for the entire home.
5. Use Shadows and Highlights Strategically
Shadows and highlights can dramatically impact the perception of depth in a room. Properly balanced shadows add dimension, making spaces appear more layered and expansive. Overly harsh shadows compress the room, while too much light flattens it. During editing, adjusting curves or using dodge and burn techniques allows precise control over depth perception. Brightening the center of a room while slightly shading corners creates a natural, inviting flow. This subtle technique tricks the eye into perceiving a larger, more dynamic space, enhancing the overall appeal of small homes in photographs.
6. Correct Distorted Lines for Clean Architecture
Misaligned or skewed lines can make a room appear cramped. Correcting these distortions ensures walls, doors, and furniture appear straight and orderly. Software tools like perspective warp, vertical correction, and horizon leveling can restore visual harmony. Ensuring that lines meet at proper angles reinforces the sense of structure and openness. By maintaining accurate architectural integrity, your editing makes the space feel professional, polished, and above all, larger than it actually is. A viewer subconsciously perceives a neatly aligned room as more spacious and inviting.
7. Brighten Corners to Eliminate Dark Spaces
Corners are often neglected during photography, leaving them shadowed and cramped. Using radial or gradient adjustments, you can brighten corners without affecting the overall exposure. This technique opens up Small Interior Space Editing, making them feel less enclosed. Highlighting corners subtly also draws attention to room dimensions, creating the perception of a more expansive area. Lightening shadowed areas can help in accentuating floor space, a critical factor in making a small home look roomy.
8. Strategically Crop for Spacious Composition
Cropping is more than removing unwanted edges; it is about re-framing a space to enhance openness. Avoid tight, centered compositions that confine the room. Instead, crop in a way that emphasizes the length or width of the room, guiding the viewer’s eye naturally. For example, leaving a portion of the foreground or including the ceiling adds verticality and depth. Balanced cropping maintains context while improving the spatial perception of small interiors. In listings, well-cropped photos immediately communicate size and functionality.
9. Reflective Surfaces to Extend Visual Space
Mirrors and reflective surfaces create an illusion of depth in interior photography. During editing, enhancing the brightness and clarity of reflections adds perceived dimension. Carefully adjust reflections to ensure they appear natural, avoiding over-enhancement that looks unrealistic. Enhancing glass windows, polished floors, or mirrored walls contributes to openness. Reflections often lead the eye outward, tricking viewers into seeing a room as larger than it is. Strategic editing of reflective surfaces can dramatically improve the spacious perception of even the smallest interiors.
10. Use Texture to Add Dimension
Texture is key in making rooms feel layered and expansive. Editing can enhance textures in flooring, walls, or furniture to add depth. For instance, slightly boosting clarity or sharpness in wood floors or fabric patterns separates elements visually. Avoid over-sharpening, as it can create harshness. Layered textures allow the eye to follow multiple planes, expanding perceived space. Highlighting subtle textures in curtains, rugs, or cushions enhances realism while making interiors feel thoughtfully designed and spacious.
11. Highlight Architectural Features
Architectural details, such as exposed beams, molding, or built-in shelving, can draw attention away from small dimensions. Editing tools allow you to enhance these features through selective brightness, contrast, or clarity adjustments. Highlighting vertical lines or elongated elements naturally elongates the room. Emphasizing these features makes small spaces appear intentionally designed and more expansive. When viewers notice the design elements first, the room’s size becomes secondary to its aesthetic appeal.
12. Balance Indoor and Outdoor Views
Windows connect interiors to the outside, adding perceived space. During editing, ensure outdoor views are visible but not overexposed. Slightly brightening the interior while preserving window details prevents the room from appearing flat. Blending indoor and outdoor lighting creates continuity, making the interior feel larger. Enhancing greenery or sky outside adds depth and visual interest. A seamless transition from inside to outside can give even a compact living room the impression of an extended space.
13. Apply Consistent Color Grading
Consistency in Small Interior Space Editing photos is crucial. Matching color tones and exposure levels ensures that each space feels part of a cohesive, spacious home. Inconsistent colors or lighting create visual fragmentation, reducing perceived size. Using subtle color grading, such as warm neutrals or soft pastels, provides a unified, airy look. A polished, harmonious appearance encourages viewers to explore the property further, enhancing engagement and increasing the likelihood of inquiries.
14. Final Touches: Subtle Enhancements for Realism
Over-editing can make spaces look artificial and smaller. Final adjustments like slight clarity, contrast tweaks, and noise reduction help maintain realism while emphasizing spaciousness. Ensure that shadows, highlights, and textures remain balanced. Small enhancements, such as softening minor imperfections or boosting ambient light, refine the overall impression without exaggeration. The goal is to make the room feel inviting, functional, and larger than it appears, all while preserving authenticity.
15. Use Virtual Staging to Maximize Space
Virtual staging is a powerful technique for small homes. Even if the property is empty or cluttered, adding furniture digitally can illustrate potential layouts. Properly placed furniture highlights open pathways, draws attention to usable space, and avoids visual overcrowding. When editing virtual elements, ensure proportionality and perspective match the real room. Avoid oversized items that shrink the space or mismatched angles that look unrealistic. Virtual staging allows buyers to visualize a functional, spacious home without physically rearranging furniture, which is especially helpful in compact interiors.
16. Emphasize Vertical Space
Many small homes have underutilized Small Interior Space Editing. Tall shelves, vertical wall décor, and elongated curtains create the illusion of height. During editing, slightly brightening walls and ceilings can enhance this effect. Highlighting vertical lines draws the eye upward, making rooms feel taller. Additionally, subtle adjustments to ceiling lighting or beams can add depth and dimension. When viewers subconsciously notice verticality, they perceive the room as larger and more open, even if floor space is limited.
17. Focus on Flooring and Ground Plan
The floor is often overlooked but crucial in expanding visual perception. Clean, bright floors reflect light, making rooms feel larger. During editing, increasing clarity, enhancing textures, or slightly brightening flooring highlights pathways and room layout. Open floor space emphasizes usability, which can make small interiors feel airy and uncluttered. Avoid darkening floors excessively, as this compresses the room visually. Highlighting flooring subtly reinforces room proportions, adding a sense of openness to the entire interior.
18. Reduce Visual Noise With Selective Focus
Selective focus is an editing strategy that draws attention to key elements while softening the background. Slightly blurring peripheral areas like walls or background décor ensures that viewers focus on spacious areas. This technique mimics professional lens effects and guides the eye naturally through the room. Combined with sharp foreground objects, selective focus emphasizes room depth and dimension. Proper use of this method can make compact interiors appear elegant, open, and well-structured.
19. Incorporate Greenery for Depth
Plants and indoor greenery add life and perspective to small interiors. While adding physical plants is ideal, photo editing allows you to enhance existing greenery or introduce subtle digital foliage. Greenery breaks monotony, creates layers, and directs attention toward open spaces. Adjusting saturation, shadows, and highlights ensures plants look realistic without dominating the composition. Strategically placed greenery can visually separate areas, giving the impression of more space while making the environment feel fresh and inviting.
20. Utilize Reflections and Light Play
Mirrors are not the only tool for reflections. Glossy surfaces like polished tables, tiles, or metallic décor can extend visual perception. During editing, enhance subtle reflections while keeping them natural. Light play on these surfaces adds depth and dimension. Reflection management, when combined with proper lighting adjustments, tricks the eye into perceiving extended space. This technique is particularly useful for hallways, kitchens, and compact living areas where visual extension is critical.
21. Highlight Functional Zones
Small Interior Space Editing often have multifunctional rooms. During editing, subtly emphasize different zones using light, shadow, and selective color adjustments. For instance, a corner workspace can be brightened, while a seating area is highlighted with soft shadows to create spatial separation. Distinct functional zones improve perception of organization and usability. By guiding the viewer’s eye naturally across the room, you make the space feel thoughtfully arranged and larger than its actual footprint.
22. Add Subtle Sky or Window Enhancements
Windows are gateways to spaciousness. Editing can enhance visible sky or outdoor scenery slightly, making interiors feel connected to open spaces. Boosting the blue sky or greenery beyond windows increases perceived room openness. Gradient filters and exposure adjustments ensure the outdoor view does not overpower the interior. A natural extension to the outdoors visually expands the room, making even small interiors feel more welcoming and airy.
23. Fine-Tune Contrast for Layered Space
Contrast is an essential tool to create dimension. Low contrast can flatten a room, making it feel smaller, while overly high contrast may exaggerate clutter. Careful contrast adjustments between walls, furniture, and floors separate layers visually. This layered effect adds depth and guides the viewer’s eye naturally. Enhanced contrast between foreground and background subtly enhances perception of spaciousness while maintaining a realistic look.
24. Final Check: Realism Is Key
After all adjustments, step back and review each photo carefully. Over-editing, unnatural colors, or distorted perspectives can backfire, making rooms feel artificial. Maintain balance between enhanced space and authenticity. Realistic edits retain trust while maximizing perceived size. A polished, spacious appearance combined with natural lighting, proportional furniture, and subtle corrections ensures that small homes look both attractive and genuinely roomy.
Conclusion: Turn Small Homes Into Visual Masterpieces
Small Interior Space Editing is more than a technical task—it is an art that transforms perception. By optimizing lighting, correcting perspectives, enhancing textures, and strategically balancing colors, small homes can appear spacious, stylish, and welcoming. Each editing choice contributes to a cohesive visual narrative that highlights the home’s strengths. Real estate professionals, photographers, and enthusiasts who master these techniques gain a significant advantage in attracting attention and boosting engagement. Ultimately, effective interior photo editing not only improves aesthetics but also elevates the marketability of small properties, turning compact spaces into irresistible visual masterpieces.